Saturday, December 27, 2014

Zombicide Rue Morgue: Yet more survivors

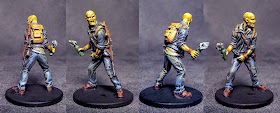
Including another member of the Gypsy tribe.
A few more finished survivors from Zombicide Rue Morgue. They are all painting up fast; just three more survivors left to paint up, and then I'll move on to the skinner zombies.

It will be nice to have them all finished before the rest of my Zombicide stuff (Angry Neighbors and a few extras) arrives in a couple months. If that stuff arrives on time, I'll be able to get everything painted and ready to go for my friends' Zombie Jesus Day celebrations (Easter.) We go to a place called Zombie Burger in Des Moines, Iowa, and then we return home to play Zombicide. At least, that's what we've done the past couple years.

Wednesday, December 24, 2014

Zombicide Rue Morgue: Survivor Maddie


Here's another survivor from Zombicide Rue Morgue. Not my favorite, but at least she was easy to paint despite all the details (suspenders, stuffed bear, pins on her jacket.) I think the sculpts (and castings) keep on improving. I haven't had any difficulty painting any of these figures so far.

So after I finished painting Maddie here, I realized I was going to paint up some of my survivors as members of a tribe (and if you're a fan, yes, the tribe I'm using are the Gypsies from the movie Bounty Killers.) It was just a matter of painting over her face and then doing a rudimentary skull-esque pattern.

It'll be a while until I get the whole tribe finished (I plan on doing 6 or 7) because a couple of the figures I want to use are in the Angry Neighbors box. But once they're done, it'll be fun to run the tribe through the Badlands (I'll have to houserule some radiation rules and use lots of Toxic zombies.)

Monday, December 22, 2014

Zombicide Rue Morgue: Some survivors


Here are my first survivors from the recent release of Zombicide: Rue Morgue. I think the figures have just been getting better and better with each new season of Zombicide. These have some great detail and were easy to paint. I love the cowgirl figure; she's a tall drink of water. Even without the hat, she's a millimeter or two taller than most of the other figures.

Something new I'm trying to help tone down the colors and unify the survivors is to drybrush all of the figures with a grayish-sand color. This weathers the figure and pulls all of the colors together.

Computer note

So the gamma on my computer monitor is a little out of whack (this is the setting that controls the intensity/saturation of white/color(?) on the monitor. I was able to readjust it to compensate, but I'm not sure if I've adequately recompensated the toning of my minis photos. If you leave a comment here, could you also mention if these photos were too dark or too light? It'll help me recalibrate everything. Thanks much!


Friday, December 19, 2014

Mice and Mystics: Ditty


Here's the last of the heroes from Downwood Tales, Ditty the shrew. I took a little extra time with her since she had a couple details that needed a patient brush (the fiddle and the flower.)

After Christmas, I plan on getting the Heart of Glorm expansion so I can complete the full set of heroes by adding Nere the shaman(?) I've began painting a couple of the bullfroglodytes.

I also return to work tomorrow after a week off, so the painting might slow down a bit. (Though, I seem to be more productive with my painting sometimes when I'm busiest at work; we'll see.)

Thursday, December 18, 2014

Rogue Planet: The Gunslinger


Here's another of my 54mm figures. Of all the conversions, this one was my least favorite, but after applying this alien-esque camouflage, her stock has risen, and she will be readily welcomed into the collection.

Just a couple more 54mmm Rogue Planet figures to go. I also have some Mice and Mystics figures in progress, and I'm in the process of priming my new Zombicide figures. As long as I don't get any new Kickstarter boxes in early, I should be set for projects for the next couple months.

Edit:

I finished another one this evening. I added the tail and the head fin using green stuff. Simple enough.


Zombicide skinner zombies (+Mice and Mystics)


My early shipment of Zombicide: Rue Morgue arrived today, so I primed up a few volunteer figures and did a quick, monochrome color test. The original plastic has an interesting color; the color -- to me -- looked almost yellow ochre in the KS photos (as well as under certain lights at home,) but are actually a subtle light green (not as neon as the Toxic zombies from Toxic City Mall.)

Instead of fighting with my greens to find a palette that would differ enough from the TCM zombies, I went ahead and chose the more ochre/beige palette. The colors here are actually Foundry's Buff Leather triad with a final highlight of Linen (on the skin.) I like the colors, and they contrast nicely against my other monochromatic zombies.

When the Seeker zombies arrive, I plan on doing them in either purple or blue (probably blue.) They come molded in black, but that would be too close to my gray zombies. I thought about using Foundry's Storm Blue, but that might also stray a little close to the gray palette. As for the skinners, I may try one or two more ideas along the lines of light brown, but I very much like my first choice here.

Mice and Mystics: Downwood Tales
Molox the mole; he's a big'un.
I got a nice start on my Downwood Tales figures, finishing heroes Ansel and Jakobe, and the minion Molox. I kept the colors consistent with the illustrations on the cards and in the book, except for Jakobe. Jakobe is a gecko and is described as having bright green skin, but I chose ochre (must be my ochre week) for his skin, copying the color scheme of a gecko owned by a friend of mine (Jeff, who commissions a bunch of my minis painting.)

I've started a couple other figures, but I imagine my Mice and Mystics figures will be my filler figures (I rarely get to play, so there is no hurry to paint them.) I should be able to get my zombies done in one or two settings, so I may return to the Mice and Mystics before too long. And yes, I still have a few Rogue Planet figures, but that's all -- just three projects.

Mouse hero Ansel.
Gecko hero Jakobe (done with ochre skin instead of green.)


Monday, December 15, 2014

Mice and Mystics: Heroes again


A while back, I purchased an extra set of Mice and Mystics miniatures (available direct from Plaid Hat Games.) I only purchased them to get some more minions (so as to try out some conversion work and to make myself a Captain Vurst.)

I've had these extra heroes from that set sitting about, so I went ahead and painted them up in some alternates colors -- colors different than from the game illustrations. These were fun to paint as usual but I have no use for more heroes (I'm sure I COULD find a use), so I'll probably sell these to fund the purchase of the Mice and Mystics: Heart of Glorm expansion.

These were somewhat rushed (the Downwood Tales box shipped quicker than expected,) but they still look great, and will certainly look fine on someone's table.

The urge to paint these was triggered with my purchase of the Downwood Tales expansion; as if I needed yet another distraction from finishing up my Rogue Planet figures. And I will get back to Rogue Planet -- I'll also need to somehow not let the early delivery of Zombicide 3 distract me, because I will certainly be eager to paint some more monochromatic zombies.

Sunday, December 7, 2014

Rogue Planet: Heavily armored


I had meant to paint this figure last, among the Rogue Planet figures, because it's my favorite. But I wanted to test a skin triad on it; I followed up by painting all of the rusty armor. All that was left was the loin cloth and the rocket pack, and, before I knew it, it was done.

I love all the different genres mixed here: Ancient gladiator, post-apocalyptic rust, retro-future rocket pack, modern minigun. I love it all on this figure.

This one was fun to put together and paint. The helmet was something I had actually sculpted myself a couple years ago. I didn't have any use for them (I have two or three) until now. I think it turned out great. All of the rest of the armor is simply green stuff thrown on, pushed around and flattened out. The minigun was made using brass rod carefully driven through disks of cured green stuff.

Oh, and the flesh triad I used on this one (all Vallejo):
Base: 875 Beige Brown
Mid: 876 Brown Sand
1st highlight: 860 Medium Flesh
Final highlight: 955 Flat Flesh

Thursday, December 4, 2014

Rogue Planet: Rocket launcher


Here's another Rogue Planet figure. She's carrying the Rocket Explosive Deliverer (also known as RED.) I kept the figure basic because I had to put in a little extra work on the rocket launcher itself, even though RED is just a collection of sections of cured green stuff, cut and fitted together. The handle and shoulder rest was made by first hammering a length of brass rod fairly flat, then bending it to fit. It took me a couple pieces of brass rod to get this part right.

The colors were a little bright, so I did a drybrush dusting of the entire figure to weather her down a little. I think she will still fit in nicely when she is seen with the rest of the post-apoc collection. (And when I finish these Rogue Planet figures, I'll take a group shot of the post-apoc collection.)

I still have four more Rogue Planet figures to go. I've been painting other stuff, so the energy is there, I just need to focus.

Tuesday, December 2, 2014

54mm Prehistorics: Getting the point


In the game "Tusk," you kill a mammoth simply by scoring one hit; it's very beer-and-pretzels. To extend my games, I give each mammoth three or four hit points. It's easy enough to keep track of this using chits or scratching tallies on a slip of paper, but I wanted a more visual method to count hit points.

I started by cutting some spear-length sections of brass rod. Then they were primed and painted as spears -- except without spear points. Next, I drilled out some holes in my large vinyl mammoths. To ensure that I could easily find the holes as the game progressed, I marked them with a little blood (well, red paint.)

So, as each hit is scored, a spear is placed into a hole, showing a mammoth is wounded and by how much. Placing the spears repeatedly into the wound holes will eventually scrape the paint off one end of the spears; this is why I didn't bother painting the points.

The holes are small enough to not be noticed when you look at the unwounded mammoths.

Simple! Now, I need to find some more 54mm/1:32 prehistoric mammals to hunt.

Zombicide: Sabaton


I decided since I demoted most of my zombivors to zombies, I could promote a zombie to survivor.
"Come at Me, Bro" is the result, a ragged punk armed with nothing but grit and fists.
I also promoted Bones' zombivor to full survivor here. I like his pose; it reminds me a little of "El Mariachi."

Tramping around the internet, I found a Swedish metal band named Sabaton, and they just happened to have a lead singer with a mohawk, and guitarists with long hair. So I figured this pair of figures would be fun to represent the surviving members of that band.

Painting these went well. I may dig out more zombivors over the next few days and paint them up proper. I also still have some Rogue Planet figures I need to finish.

Sunday, November 30, 2014

Zombicide: Seemingly random figures


So what makes this little random assortment of my Zombicide figures significant? These are the last five figures of my entire collection finally painted! Now, I have to wait for my Season 3 stuff to arrive.

All five of these figures are actually zombivors. I don't play using zombivors -- or, when I do, I simply keep using the original survivor figures. Instead, I chose some of the less "zombified" zombivors and simply painted them up as extra survivors for use in Zombicide as well as other zombie/post-apoc games (All Things Zombie, After the Horsemen, Zed or Alive.)

The remaining figures, I painted up in the gray monochrome and dropped them into the general population. The white ring is to identify these grays as VIP walkers; I figure I'd give them a little extra street cred for having been demoted.

I'm starting to get used to the Vallejo skin palettes I've settled on. My usual style is bright and bold, and it works great for my Zombicide survivors to help them contrast against the monochrome hordes. But I also like a more toned-down, realistic look to figures, and the Vallejo skin palette has helped me tone down some of the other colors as is seen in figure in the center of the photo. I'll try to give both color styles some equal brush time in the future.

Now, I can't wait for the next batch of Zombicide!

Friday, November 28, 2014

Rogue Planet: Heavy machinegunner


Still proceeding slowly, but here's the next of the Rogue Planet figures. The heavy machine gun came out looking a little more steam-punkish than I'd like, but it should still blend in once this figure joins the general population (still needs to be varnished.) The gun was made from cuts of varying sizes of green stuff cylinders as well as pieces of brass rod. The rods look bare in the photo, but they're actually painted; maybe I should consider a different color.

All the conversion work on this figure -- quilted manica, shoulder armor, loin cloth -- were made from green stuff. The rocks on the base were made using some broken up cork.

I have a few more Rogue Planet figure conversions to paint up. They're not difficult to paint, I'm just going slow as real work sucks away my life force (I had to work on Thanksgiving even -- but at least I got out a little early and used that time to paint the bulk of this machine gunner.)

Other stuff

I painted these up a year and a few days ago. Do I want to paint more?
I've been wanting to play some serious Zombicide lately; I'll probably have to go solo for now, but in the mean time, I have the last four figures of my entire collection on the table getting painted. Just a couple survivors and a couple zombivors getting painted up as regular zombies. (Actually, I think they're all zombivors.) I look forward to having the entire collection finally painted up. Only took a little over a year.

Speaking of which, it's been almost exactly one year since I tried a little experiment with some gray paints and a few walkers. I've been thinking about buying another box of walkers just so I can paint'em up all monochrome :)

42mm

I also put down the first payment for a new samurai. Sculpting will start in a few days. I look forward to seeing a finished figure (and painting some more samurai) in a few weeks.

Space Hulk

The Space Hulk stuff is put away for now. I wanted to pick up a copy before it left again for a few years. It will eventually get painted (and played!) I think I will stick with the classic blue/purple skin for the genestealers. I'll be painting the terminators up as Flesh Tearers; I also picked up a squad of Deathwing Death Angels.

Tuesday, November 25, 2014

Rogue Planet: Soldier


Here's another of my Rogue Planet-specific figures, this one based on my Nyarlathotepic aliens.
He's armed with a gloved/manica carbine and has some unique armor to fit his body, all made from green stuff.

The Rogue Planet figure painting is going a little slower than I had expected; I've been coming home tired from work. But I'll try to pick it up a little here. I work through the holidays, but I certainly have time to paint. I'm actually almost halfway through this batch of 10, so it shouldn't be too long.

In other minis news, I'm close to pulling the trigger on another (42mm) samurai commission with Steve Barber. I've got the pose chosen (hasso no kamae.) I just want to make one more run through the net for some reference photos. The more reference pics I can provide, the easier it is for Steve to sculpt. I'm guessing I'll get a completed figure in a nice area of time before I start receiving a bulk of Kickstarter projects I backed a few months ago -- especially Zombicide and Mercs; there'll be plenty to paint between those two.

Tuesday, November 18, 2014

42mm Samurai group shot


Here is my current group of 42mm (Steve Barber Models) samurai standing on my new display base. There are 60 figures here with space enough for 3 more (not including the space at the top corners where I have terrain elements.) I can also drop another 15 figures along the front on the ground level if I want ... and I do.

I use these for skirmish gaming, mostly using a converted Red Sands, Black Moon ruleset by Two Hour Wargames. I've got plenty of ronin, peasants, ninja, monks, a pair of Edo street gangs, one Zatoichi, and a few representatives of my own little fictional clan. I eventually want to add some figures to represent a rival clan (maybe with the next commission) and maybe a few more monks, but otherwise, I'm pretty satisfied with this collection. There are more than enough for just about any skirmish game. If I had extra money, I might consider commissioning some civilians.

This is actually not the entire collection; I still have my armored samurai bushi, which are still for sale ($400 for the lot pictured below, includes domestic shipping.) Plenty of figures -- enough for a small skirmish (such as in "Ronin" by Osprey.)


Monday, November 17, 2014

42mm Samurai: Simple display terrace

My display base can hold around 60 figures on 40mm bases. I left space in front
of the terrace (when it's placed on my shelf) to place another dozen figures.
A few months ago, I took a group photo of all of my 42mm samurai. This week, I realized the collection has grown by at least 20 figures, so it's time to take another group photo.

I also decided it was time to build another display terrace to hold all of those figures. I got everything put together and mostly painted before I realized I should share a quick and simple tutorial. So here you go!

You'll see the whole piece in a later post, when I get a group photo of all of my samurai on it.

Things you'll need

-- Large square of blue foam (I used 24x24" here for a 24" long terrace with 1 3/4" deep levels.
-- Foam cutter or other method for cutting your foam in relatively straight lines.
-- Craft paint: Black, white and a grass green
-- Foam glue (or your preferred adhesive) for gluing the foam together
-- White glue for attaching grass
-- Lots of static grass or flock (Woodland Scenics sells large shakers of static grass.)
-- Optional: I used a metal yard ruler taped to the foam to act as a guide for my foam cutter, so that I could cut long, straight lines.

Doin' it

Yep, just a bunch of stacked blue foam. Measure first!
This is the back side, so it doesn't need to look good at all.
This will need some planning on your part. Decide how deep your terrace level will be first, and draw everything out. I stacked my levels solid (no open space beneath any of them,) and I ended up using all of my 24x24" square of blue foam for a display terrace that was 24" long by about 11 1/4" deep (and a half inch thick.)

Your usage will vary with the depth of terrace levels you use. Mine are 1 3/4" deep so that they are large enough to comfortably hold a 40mm base. A 1 1/2" depth will work fine for most 28-32mm figures (easily fitting 30mm bases.)

I'm not going to go into too much detail here, assuming you know how to do basics such as cutting and gluing foam. But cut your foam into the component pieces. All the pieces should be the same length, and the bottom piece should be the widest (widest = measuring front to back of the entire piece.) The next piece up should be 1 1/2" narrower than the bottom piece, and the next piece 1 1/2" narrower than that, and so on, going up.

Make sure everything dry fits nicely, so that you can see that you left ample room for your minis to stand on. Then glue it all together!

Spread some glue and sprinkle some static grass (or flock).
When the glue is dry, apply a coat of paint. I did my base coat in black so that I could follow up with gray (mixing in the white) to drybrush some rough stone work on the fronts of each level. I then painted green where the grass goes. The glue and static grass will cover most of this green undercoat, but it's nice to have in case you miss a spot or two when applying the grass.

After the paint is dry, spread some white glue over every surface you want there to be grass. Then apply your static grass. Let dry. Done! I find it easier to apply the static grass in steps, doing one or two terrace levels at a time. But there's nothing saying you can't do it all at once.

Optional step: Since this is for display and will sit on a shelf, I don't require a lot of strength; if you plan on moving this piece a lot and want a little added strength, after the paint has dried, apply a coat of white or wood glue over the entire piece, especially at the susceptible edges (careful not to leave large drops of glue spilling over.) You can add multiple layers of glue for more strength if you want.

This glue layer helps to prevent your blue foam from chipping if its corners get bumped, by adding a sort of shock-absorbing layer (white glue should dry somewhat flexible.) It doesn't add a LOT of strength, but enough to protect from those minor bumps and drops.

Rogue Planet: Nyarla, Rifle and Gun Gladiator

Here are the first of my 54mm (Bronze Age Miniatures) figures converted specifically to play the new skirmish game "Rogue Planet."


The orange on Nyarla (the tentacle-headed figure) started with "rust" color (from the out of production Reaper Pro Paint series -- probably the best quality paints there ever were -- even better than Vallejo.) It was followed up with the Foundry orange and yellow ochre triads.
Nyarla is my favorite; she doesn't have a lot going on -- not a lot of details, but I like her organic form and movement contrasted against the hard metal of the triple-barreled heavy machine gun.


I kept the rifle/sniper woman simple. She got a pair of boots, some hair and a big cape. And to make her slightly more safe for work, I gave her an alien mix of purple and green skin. The colorful skin and big cape were done deliberately: I wanted the figure to say, "Yeah, I'm a sniper and I'm right here, so what are you going to do about it?"


The last figure serves as sort of a transition figure between all of these new ranged weapon fighters and the original melee fighters (some of whom include heavily themed gladiators.) To make things simple with arming the new figures, I decided the main battle rifles ("carbines" in the game Rogue Planet) would be held/worn through an armored gauntlet (manica.) This warrior is one of my basic foot soldiers.

So there will be plenty to come over the next couple weeks. All of the new apocalators are based, primed and ready to paint. I just have to put paint to figure.

Friday, November 14, 2014

Rogue Planet figures WIP

Yep, naked sniper, gladiator with a minigun and some tentacle people. Also yes, a finned-head lady with a tail.

Rogue Planet figures are finished being converted. Next up will be fitting them for pins for pinning to bases. After the pins are installed, I'll begin priming. Then painting!

Space Hulk figures are all assembled, including a Deathwing squad I picked up (I'll probably get one more Deathwing squad for the full "Bringer of Sorrow" complement.) The plan is to paint the Space Hulk figures once I've finished painting the Rogue Planet figures, but I'll probably end up painting the random terminator or genestealer as the RP figures progress.

Tuesday, November 11, 2014

Breaking the Games Workshop fast

See what Andy made me do; I don't even have proper photography space!
So Bryon's friend Andy visited last week, and he brought his Tyranid army among a few other GW odds and ends to paint. I saw that he had some Space Marines, and I asked if he had any beaky marines I could paint -- and he did!

I first got into Warhammer 40K in 1988 (The Rogue Trader days.) My first army was Imperial Guard, but I had a platoon of Space Marines, too. In 1989 or 90, I traded my 40K stuff for my fantasy Empire army (which I still have and has been posted to this blog before.)

Games Workshop's business practices pushed me away in the late 1990s. I've been repainting off-and-on my Empire figures, but I hadn't touched a Space Marine since 1990, until Andy let me paint his. Well, that was fun, I painted a couple up, and they went fast, but the sculpts were crisp and the lines still familiar 25 years and a few incarnations later.

Now, I didn't go out and buy myself a chapter; instead, I went sideways and purchased arguably one of GW's best specialist games ever: Space Hulk. Thank goodness it has only a few minis, but I wanted them protected, so I purchased the Battlefoam tray.

The terminators in the box are Blood Angels, but in my day, I remember the Deathwing Dark Angels, and that's what I wanted, so I picked up the dataslate which has rules for the Dark Angels. Then I went to eBay and bought a squad (+1) of Dark Angels. (The +1 has a plasma cannon which is detailed in the dataslate.)

So here I sit, one week later, $180 spent, and with a 25-year 40K hiatus broken because Andy let me paint a couple beaky space marines. But I'm pretty sure it'll stop there. I have other things to do, so not much extra time or space for more 40K. And if it does go bigger, with say a chapter of space marines, I will name them, in cursing Andy, The 1,000 Dammits. Their color will be Angry Yellow (Bryon and Andy will know what I mean by that.)

(By the way, I am remaining disciplined and have finished quite a bit of work on the Rogue Planet 54mm figures. Still a bit of green stuff work to do, but they're almost ready to be primed. I'll try to get a photo of the pre-primed converted figures later.)

Everybody needs a Bruce Lee figure

It's the final hours of the Dragon Tides kickstarter. If you ever wanted an officially licensed Bruce Lee figure, this is where to get it. True, there are many "not" Bruces out there already, but it's nice to get one personally endorsed by his wife and daughter.

Oh, and there are also miniatures of Brandon Lee (Rapid Fire AND The Crow versions), Jackie Chan, Jet Li, Donnie Yen, Chuck Norris, Bolo Yeung, Dolph Lundgren, and Jean Claude Gosh Darn! And yes, there are a few more, including cross-over figures from companies such as Soda Pop and Level 99 Games, expansion figures (Kiddo), and a small mob of henchmen for your heroes to fight through.

If the game doesn't interest you, you can also just pledge to add on most of the minis. So go check it out! (Yes, I'm a backer, but even if no one else pledges, there are already plenty of great characters unlocked. I look forward to painting these next year.)

Wednesday, November 5, 2014

Rogue Planet minis coming along

Nyarlathotep with his children. Still WIP.
Nyarla means business with the Big'un.
Got some more work done on my Rogue Planet figures, especially on my children of Nyarlathotep. I also plan on doing some figures up as lizard people, but those conversions will probably be as simple as green skin and maybe a fin on top of the head or something -- so a classic Star Trek level of creating aliens.

The remainder will be good, old-fashioned human beings, including a historically accurate gladiator with a minigun arm and a rocket pack. You'll see him later.

Tuesday, November 4, 2014

54mm Rogue Planet WIP


This is my first official Rogue Planet post. I've looked over the rules to get some ideas, and got a good start on things.

One thing about the rules is that they are generic, allowing players to use the mechanics of the game to create their own narratives. For example, a unit (unit can be a group or an individual) could have the attribute "Flyer." But how do they fly? This is up to you; you can, for example, say the unit has wings, or maybe anti-grav boots or (in my case) jet packs.

You can also combine the listed weapons in the game to create new weapons. An example Brent Spivey uses in his rules are combining an axe with a chained blade upgrade to create a chain-axe (chain as in chainsaw, for those not familiar with Warhammer 40K weapons.)
Melee weapons can have power upgrades. These upgrades can be explained as technological or magical as chosen by the player. (Tech or magic doesn't change the rules, only the setting or theme the player is trying to create for himself.)

One of the weapons -- carbines -- seem to be the main battle assault weapon. I've chosen to represent carbines as a weapon held using sort of a glove or gauntlet making the weapons look like extensions of the figures' arms. You can see it in varying stages on the two figures at the bottom of the photo. I'll probably add armor all the way up the arm -- a manica, using gladiator terms. About a third of the new figures will be fitted out this way, to represent my line troops (though, one of these is slated to get a jet pack).

The figures along the top of the photo, from left, are a sword and pistol warrior (what better to represent both sci fi and fantasy), a heavy launcher (missile launchers -- I think?), and -- my favorite -- a machine gun. My machine gun depicts three automatic weapons combined to make a bastard, triple-barrel machine gun. I call it the "Big'un."

I have a figure among my post-apoc gladiators inspired by Lovecraft's Nyarlathotep. I thought this would be a good chance to make a couple more figures converted to his race, hence, the tentacly looking head on the figure holding the Big'un. I'll call her Nyarla, after her dear elder dad.

And yes, that's a gladiator helmet; because it's sci-fantasy, that's why.

Saturday, November 1, 2014

Packin' some jets

"Og, this better than wheel."
I gathered some bits and green stuff and made myself a couple retro-ish rocket packs. The new Rogue Planet game (PDF is out now!) has rules for flyers, and my flyers will be doing so because of their new rockets.

These were easily kitbashed. The boosters come from Hydra Miniatures rocket cycles. The square fins are extra bits from when I converted some rocket cycles from Bombshell Miniatures. Everything else is either plastic or green stuff.

I had planned on adding some techy bits (you can see between the rockets in the second photo, but this made the packs a little too large for the figures. The figures these will go with won't be much different from the prehistoric figures they're being modelled upon. After all, Rogue Planet is Sci-Fantasy. (In the end, the wearers will probably be a little more post-apoc looking than prehistoric.)

Back to reading the rules, which are proving great at giving me ideas for models and conversions (ammo grunt -- I wonder if I can build an ammo-"bot"?)

Thursday, October 30, 2014

Soccer City

Art from the game. Done by Jose Consuegra.
I'm a sucker for games with great art design and Soccer City certainly has some of that. The artist is Jorge Consuegra, and his illustrations are done in a wonderfully retro style that fits the game perfectly. The style (etching or rough brush strokes with pastel tinted colors) actually reminds me of mid-20th century political cartoons, but it still works great for a sports game.

Gameplay looks simple, fun and intuitive. Have a look at the intro video as well as the two gameplay videos and you will get a great idea on how it plays.

The Soccer City Kickstarter campaign is going on right now. I'm still on the fence about getting it myself; I don't have many friends who would play it with me, and the entry price to get the game is $70 (BUT that does include shipping from Europe.) But I think I could play this one somewhat solitaire, randomly choosing battle cards and trying to be impartial when repositioning playsers. In any case, it would still be a nice bit of art to have on the shelf.

And if you REALLY like the game, there's a $189 level in which Jose will illustrate you as a legendary player (part of the expansion that goes with the game.)

My favorite bits of art are all the goalie saves; this one is probably the weakest (but the only I could find big enough to run here. Much of the card art (and better goalie images) can be seen on the Kickstarter page.

Lost Japan


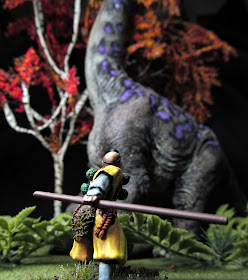
Blog follower Ted requested some pics of dinosaurs and samurai, so here are just a few that I had time to set up. These 42mm samurai (by Steve Barber) are actually very close to the same scale as these dinosaurs, so a Lost World type adventure game in old Japan isn't actually out of the question.
In fact, the beer and pretzels dino-hunting game "Tusk" actually has rules for Conquistadors vs. Dinos that could easily be converted to Samurai vs. Dino (change pike to spear and rapier to katana; Tusk really is that simple.)

In other minis news, I'm eagerly awaiting my new batch of 54mm generic figures. I have a lot of ideas running through my head. If the Rogue Planet rules pdf gets released soon, it'll give me even more ideas; I saw some mention of "pawns" in the game -- characters that seemed to act like a supporting cast (for example, I saw mention of a "ammo grunt.") I would love to model two or three of those pawns. You just don't see a lot of figures like that, and it would add some more flavor to the game. I'm also thinking of making a jet/jump pack or two for the figures, though, I'd like to see if anything like this is actually in the rules first ... I'll probably just add the jetpacks anyway.

And speaking of gaming rules, check out Two Hour Wargames new rule set, "Two Hour Dungeon Crawl." Finally, a true solo dungeon crawl! You can even play the game out on graph paper; how old-school-cool is that? You can find the rules on sale here.